The following explains using the smartphone app screen.
Configure the button
This is a method of assigning your favorite scene recalls and lighting operations to the buttons on the handy remote control.
1
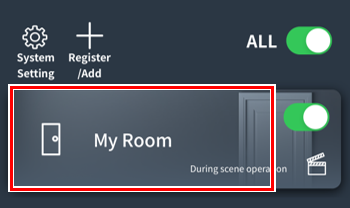
Tap the room that contains the handheld remote you want to set up.
2
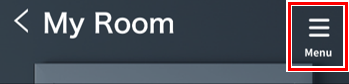
Tap “Menu.”
3
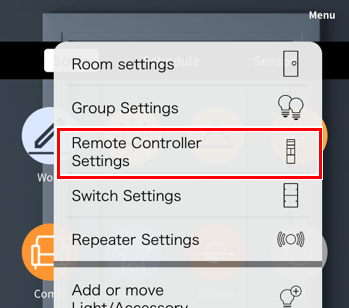
4
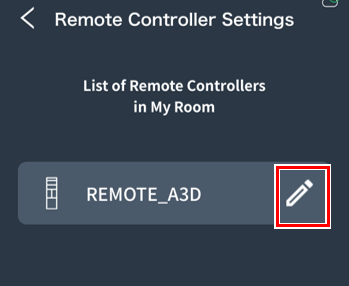
A list of remote controls will be displayed.
Tap the edit button for the remote you want to configure.
5
The remote control button settings screen will open.
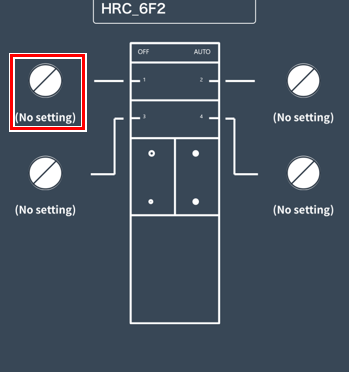
Tap the button you want to assign.
6
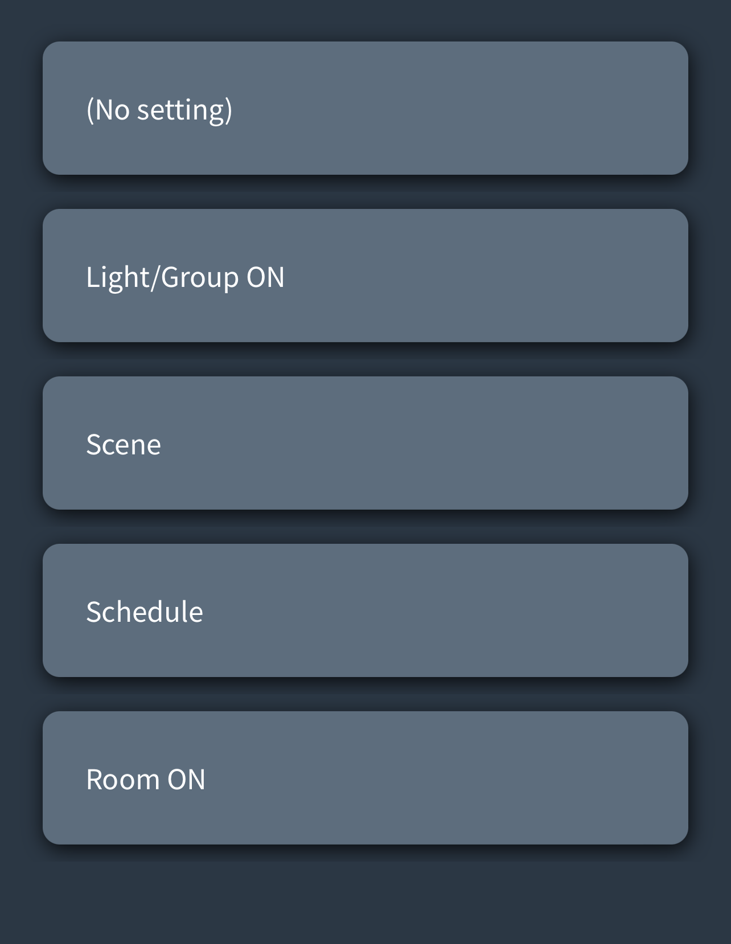
Select the action you want to assign to the button
About the button settings screen:link
7

Once you have assigned all the buttons, tap “Save.”
8
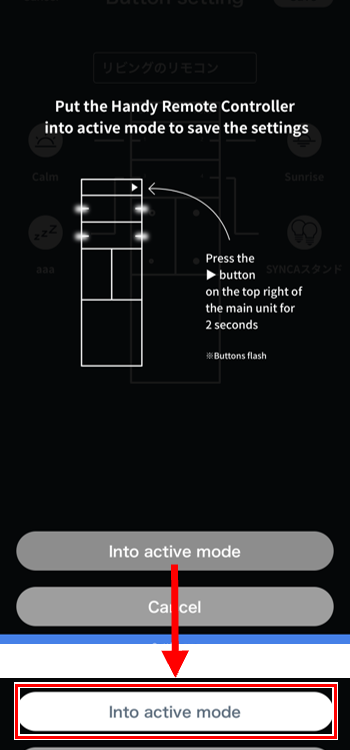
When the screen on the left appears, follow the instructions on the screen to put the handheld remote control into active mode.
Wait a few seconds and the “Active mode” message will turn darker, so tap it.
9
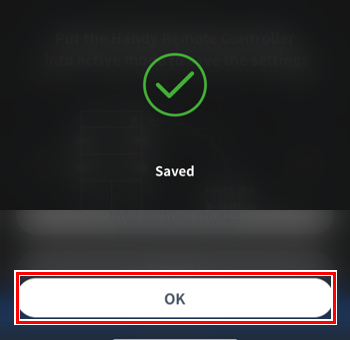
Tap “OK”.
10
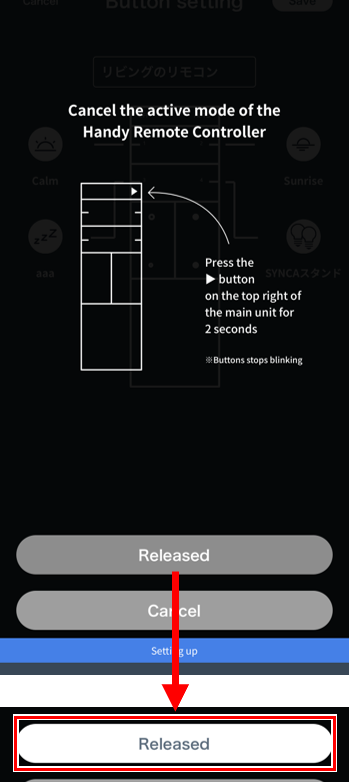
When the screen on the left appears, follow the instructions on the screen to disable the active mode of the handheld remote control.
Wait a few seconds and the “Unlocked” message will turn darker, so tap it.
Now the button is configured.
Change name/Check information/Initialize
1
Refer to steps 1 to 5 in “Setting the buttons” on the previous page to open the remote control button setting screen.
2
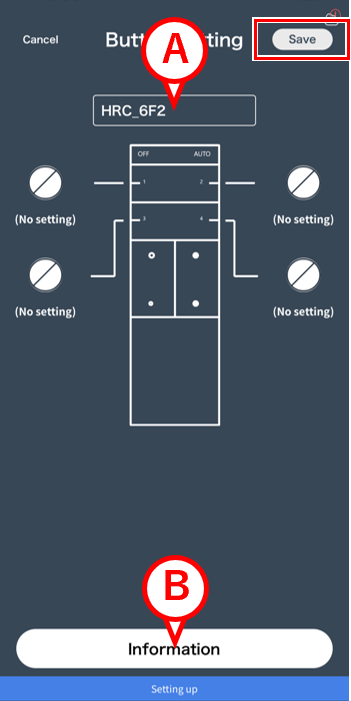
If you want to change the name of the remote control, tap A , enter a name, then tap “Save” to complete.
If you want to check the information or reset it, tap B.
3
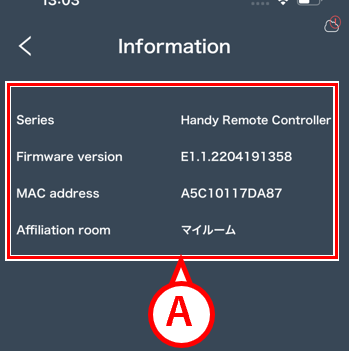
The information screen opens
A allows you to check various remote control information.
If you want to initialize the remote control, go to next step.
4
If you have a handy remote control
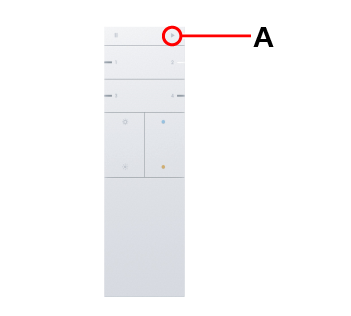
Press and hold the light button A on the remote control for 2 seconds to enter active mode.
5

Tap “Delete (Initialize)”.
6
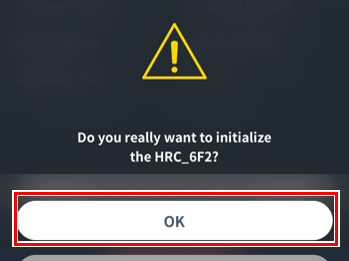
Tap “Yes”.
This completes the initialization.
If you don’t have a handy remote control
4

Tap “Delete (Initialize)”.
5
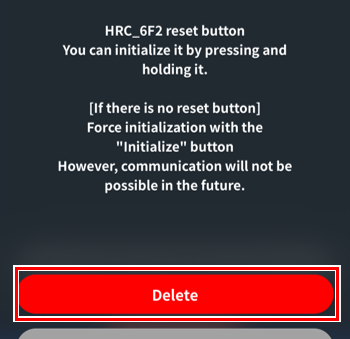
Tap “Initialize”
This completes the initialization.